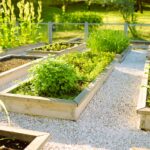
Raised beds are a great way of having a ‘controlled’ method of growing fruit and vegetables.
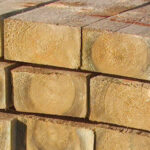
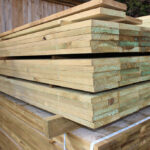
Usually constructed from railway sleepers, or smaller section timber such as treated gravel boards. They can vary in height according to the requirement; higher raised bed are more convenient for those with mobility issues.
A major advantage of raised beds is that the growing medium can be tailored to the crops being grown. For those who’s soil is of poor quality, raised beds can be filled with good quality topsoil and compost. If used for growing soft fruit, the timber sides are great for attaching a framework and netting to keep unwanted birds off ripening fruits.
Why use raised beds?
Raised beds are freestanding, enclosed beds chich are constructed above the ground level, they are a convenient solution for many gardens and allotment spaces and they can make attractive features in you outdoor spaces.
Especially popular for growing vegetables and soft fruit, they can also be used for cut flowers, ericaceous plants and alpines, when specific soil conditions are required. Raised beds also easier to maintain the growing directly into the open ground, largely due to their limited size and working in a contained area. They are also more accessible for gardeners with restricted mobility when working in the ground can be problematic.
Benefits
-
- As you can fill raised beds with a fertile and free-daring growing medium they are great for improving growing conditions – this can be especially important when the soil in the garden is of a poor qualty, or heavy and prone to becoming waterlogged.
- Certain vegetables groups require different soil conditions, this is true of some varieties of shrubs and plants, raised beds are great for being able to match the soil to the plants growing requirements.
- Raised beds assist in increasing the soil temperature in spring due to the limited area that needs to warm up, this is especially good for getting plants off to an early start at the beginning of the growing season.
- Crop rotation is much easier to practice when using raised beds and they are easier to cover to protect from frost and preventing insect feeding damage.
- Especially convenient for gardeners who may be confined to a wheelchair or who are restricted in working at ground level, raised beds are a perfect solution to provide greater accessibility.
Building timber framed raised beds
Raised beds can be built at any time of the year, most gardeners opt to do it in winter when there are less other jobs to do in the garden. It is just important to avoid working the soil if it is frozen or very wet as this can affect the soil integrity. Also, if you have heavy soil and waterlogging is an issue, building raised in the summer when the ground is drier and easier to cultivate is advisable.
Step 1. Dig a shallow trench
Mark out the area for the bed using pegs and string and dig a shallow trench to the desired dimension, wide enough to fit the timbers being used.
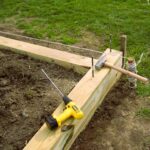
Step 2. Position the timbers
Set the first layer of timbers into the trench, making sure they are all aligned using a spirit level, it is important to check the levels diagonally at the corners as well as along the individual lengths.
Step 3. Fixing the timbers together
To fix the timbers together, drill through the the end timber into the the sleeper behind, at each corner, at the top and bottom of the timbers. The holes need to sufficient to accommodate long, heavy-duty coach screws. The screw the timbers together to keep them secured and in place.
Step 4. Add another layer (if needed)
If you choose to add a second layer; position the timbers in place atop the first layer, ensuring the new layer overlap the joints below to provide extra structural strength. As previously, screw the timbers in place, Repeat this process until the bed is at the desired height. If you are building a bed with more than one layer, fix vertical batons inside each corner to secure the layers together.
Step 5. Prepare the base of the bed
Lift and remove any turf which exist from the base of the new beds and then lightly fork the soil over to loosen it. For deeper beds, you may wish to to add a layer of rubble or or subsoil to the base of the bed to provide better drainage, this will also reduce the the amount of good soil required to fill the bed.
Step 6. Fill the bed
In the main, a general soil mixture of three parts compost, two parts sharp sand and seven parts topsoil is adequate for most raised beds. For Plants that like good drainage, such are herbs, alpines and bulbs it is advisable to double the proportion of sand to the mix.
Step 7. Let the bed settle.
Having filled the bed to around 5cm below the rim of the timbers, firm down the soil with the back of a garden rake and let it settle for about a fortnight, topping up the level again if required. Then the beds are ready for you start the planting or sowing.
Other materials use can use to build raised beds
Whilst timber is the most common material material for building raised beds, you can also consider using bricks, breeze blocks or even paving slabs inserted on their side.
Feature Products